Category: Uncategorized

  • Choosing the Best Basement Remodeling Services in Dacula, GA

    Choosing the Best Basement Remodeling Services in Dacula, GA

    Dacula is one of Gwinnett County’s most rapidly growing communities, known for spacious family homes and vibrant suburban neighborhoods. Whether your home is located near Hamilton Mill, Harbins Road, or downtown Dacula, an unfinished or outdated basement represents a major opportunity to expand your living space without moving.

    Transforming your lower level into a custom media lounge, guest suite, or home office requires more than just drywall and paint. You need a trusted local contractor who understands Gwinnett County building codes, soil and moisture conditions, and regional architectural trends.

    Here is your complete local guide to selecting the best basement remodeling services in Dacula, GA.

    Why Dacula Homeowners Invest in Basement Finishing

    Finishing a basement is one of the smartest ways to build long-term property equity in eastern Gwinnett County. Homes in Dacula often feature full daylight or walk-out basements that naturally lend themselves to modern, functional transformations.

    Popular Basement Upgrades in Dacula

    • In-Law and Guest Suites: Perfect for hosting extended family, featuring private entrances, full bathrooms, and compact kitchenettes.

    • Home Theaters and Game Rooms: Creating dedicated acoustic spaces for weekend football games and movie nights.

    • Custom Home Gyms and Offices: Dedicated work-from-home suites and workout zones equipped with specialized rubber flooring and recessed LED lighting.

    Key Factors to Consider When Hiring a Dacula Basement Contractor

    Choosing the right partner for basement remodeling in Dacula directly impacts your project timeline, overall budget, and final quality. Before signing a contract, evaluate these four critical areas:

    1. Direct Knowledge of Gwinnett County Building Codes

    Building regulations in Gwinnett County mandate strict adherence to residential codes—including proper ceiling height clearances, egress windows for bedrooms, and dedicated electrical circuits. Partnering with a licensed local contractor ensures all structural, plumbing, and electrical work passes inspection cleanly.

    2. Moisture Defense and Foundation Prep

    North Georgia clay and seasonal rainfall require proper moisture mitigation before installing subfloors or insulation. Experienced local contractors evaluate foundation walls, recommend vapor barriers, and ensure proper drainage systems are in place so your investment stays dry for decades.

    3. Clear, Itemized Estimates Without Hidden Fees

    Avoid vague price estimates that lead to change orders mid-project. Look for a contractor who provides detailed scopes of work covering materials, labor milestones, and realistic timelines upfront.

    4. Dedicated Single Point of Contact

    Managing multiple subcontractors can derail a project. Choosing a remodeling team that provides a dedicated project lead guarantees clear daily communication and keeps construction moving forward on schedule.

    How the Hill Residential Contractors Process Works

    At Hill Residential Contractors, we simplify home renovations for families throughout Dacula, Buford, and surrounding Gwinnett County neighborhoods. Our structured four-step approach eliminates stress and keeps your project on track:

    Stage What Happens During This Phase
    1. Consultation & Planning We discuss your vision, evaluate foundation layout, measure square footage, and establish a clear budget.
    2. Architectural Design & Permits We draft floor plans, select fixtures/materials, and file all necessary Gwinnett County permits.
    3. Expert Construction Our licensed tradespeople handle framing, electrical, plumbing, HVAC extension, drywall, and custom tile.
    4. Final Walkthrough We review every detail together during a final inspection to guarantee 100% satisfaction.

    Ready to Transform Your Dacula Basement?

    Whether you are looking to finish a brand-new space or upgrade an existing layout, working with a licensed, locally trusted remodeling specialist makes all the difference.

    Hill Residential Contractors proudly serves homeowners across Dacula and North Atlanta, delivering high-end craftsmanship, zero surprise costs, and reliable project timelines.

    Let’s bring your basement vision to life!

    Contact Hill Residential Contractors today to schedule your in-home consultation or call us directly at (770) 568-0060.
  • Is a Finished Basement Worth It? ROI & Value Breakdown for North Atlanta Homeowners

    Is a Finished Basement Worth It? ROI & Value Breakdown for North Atlanta Homeowners

    For homeowners in Alpharetta, Johns Creek, Suwanee, Roswell, and across North Atlanta, maximizing home equity is always a top priority. When considering large-scale home updates, one question comes up frequently during planning sessions: Is a finished basement worth the investment?

    While projects like kitchen transformations and spa-like bathroom remodels get immediate attention, full basement transformations consistently rank among the most effective strategies for expanding usable space and driving long-term equity growth.

    Here is a detailed breakdown of the financial return on investment (ROI), buyer appeal, and lifestyle value of professional basement remodeling services in the North Atlanta market.

    What Is the Average Financial ROI on a Finished Basement?

    Nationally, basement finishing projects yield an average return on investment of 60% to 75% at resale. However, in high-demand North Atlanta suburban markets—where square footage, modern amenities, and flexible living spaces carry premium market value—that ROI often trends even higher.

    How Basement Space Impacts Appraisal Value

    While subterranean or below-grade square footage is valued slightly differently on formal appraisals than above-grade living areas, it significantly increases your home’s total usable square footage. When executed with professional craftsmanship, proper ceiling heights, continuous HVAC, and code-compliant egress windows, finished basements allow appraisers and buyers to classify the space as functional, high-value living area.

    Key Features That Drive the Highest ROI

    Not all basement features offer equal returns. If market value and resale equity are primary goals, incorporating these features delivers maximum impact:

    1. In-Law Suites and Private Guest Quarters

    Multi-generational living is a rapidly growing trend across North Atlanta. A basement layout featuring a private bedroom, full bathroom, and living room (or kitchenette) substantially broadens your potential buyer pool and commands premium pricing.

    2. Flexible Home Offices and Fitness Spaces

    Modern buyers prioritize dedicated work-from-home setups and health spaces. Converting a quiet corner of your basement into a sound-insulated office or custom gym adds immediate functional utility without sacrificing main-floor living areas.

    3. Second Living Rooms & Entertainment Hubs

    Creating an open-concept media room or wet bar for family gatherings and game days enhances lifestyle comfort while serving as a major visual selling point during walkthroughs.

    Beyond Financial ROI: The “Lifestyle ROI”

    While financial returns are crucial, the daily lifestyle value of expanding your home shouldn’t be overlooked:

    • Eliminating Spatial Friction: Give teenagers, visiting relatives, or hobbies their own dedicated zones without crowding the main level.

    • Future-Proofing Your Home: Adapt the space over time—transitioning a toddler playroom into a gaming den or a peaceful home office.

    • Avoiding the Cost of Moving: Remodeling an existing foundation delivers additional living space for a fraction of the cost per square foot compared to buying a larger home in today’s housing market.

    How to Maximize Your Basement Finishing ROI

    To capture maximum value and avoid common pitfalls that hurt home equity, focus on these critical renovation elements:

    1. Prioritize Moisture Defense: Even the most luxurious finishes lose value if dampness or water intrusion occurs. Comprehensive waterproofing and vapor protection must come first.

    2. Match Main-Level Quality: Maintain design continuity by matching flooring, trim, doors, and hardware standards to the rest of your home so the basement feels integrated rather than added on.

    3. Hire Licensed Professionals: DIY framing or unpermitted electrical and plumbing work can complicate real estate disclosures and reduce property value during home inspections.

    Partner with North Atlanta’s Trusted Remodeling Experts

    A finished basement is more than an aesthetic upgrade—it is a strategic investment in your family’s quality of life and your home’s market value.

    At Hill Residential Contractors, we specialize in delivering high-end, fully customized basement remodeling services across Gwinnett County and North Atlanta. From initial spatial design through final inspection, our team delivers seamless execution with clear pricing and zero unexpected surprises.

    Ready to unlock the full potential of your home?

    Schedule your basement consultation with Hill Residential Contractors today and let us help you build lasting equity.

  • The Real Cost of Basement Remodeling Services in Gwinnett County

    The Real Cost of Basement Remodeling Services in Gwinnett County

    An unfinished basement represents one of the largest untapped assets in your home. Whether you are dreaming of a luxury home theater, a private guest suite, or a vibrant playroom for growing kids, turning raw square footage into usable living space adds immense practical value to your daily life.

    However, before diving into design choices and paint colors, every homeowner faces the same fundamental question: What does a basement remodel actually cost?

    If you are evaluating basement remodeling services in Gwinnett County, understanding the true cost breakdown—and where your budget goes—is essential for a smooth, stress-free project. Here is your comprehensive guide to basement remodel costs in Gwinnett County for 2026.

    Average Cost of Basement Remodeling in Gwinnett County

    Basement remodeling costs vary significantly depending on the existing condition of the space, square footage, layout changes, and finish choices. In Gwinnett County and surrounding North Atlanta communities, most professional basement renovations fall into three general categories:

    Remodel Tier Average Price Range Best Suited For
    Basic Basement Finishing $30,000 – $55,000 Open concept, drywall, basic flooring, lighting, and HVAC extension.
    Mid-Range Basement Remodel $55,000 – $95,000 Added bathroom, defined rooms (bedroom/office), custom storage, upgraded lighting.
    High-End / Luxury Remodel $95,000 – $160,000+ Full guest suite/in-law apartment, wet bar/kitchenette, home theater, custom tile, high-end finishes.

    Note: On a cost-per-square-foot basis, most quality basement projects range from $35 to $90+ per square foot, depending on trade work (plumbing, electrical, structural) and material quality.

    Core Factors That Impact Your Basement Remodel Budget

    Understanding what drives project pricing helps you prioritize features that deliver the highest personal value while keeping your budget on track.

    1. Plumbing & Bathroom Additions

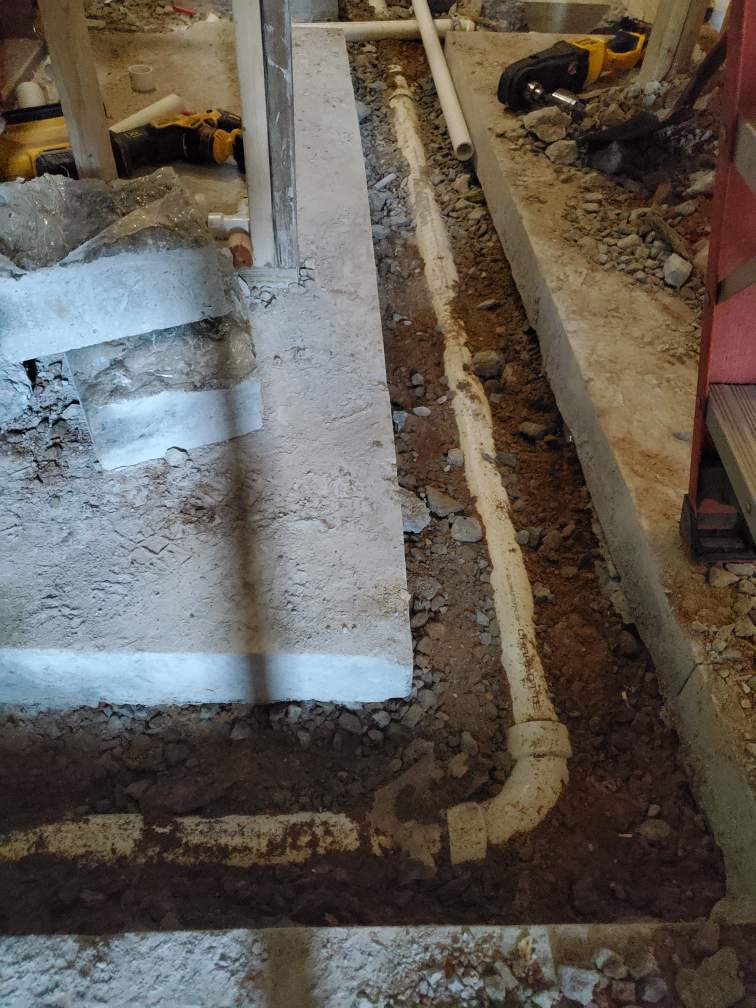
    Adding a full or half bathroom is one of the single biggest cost drivers in a basement project, primarily due to concrete cutting, drainage routing, and fixture installation. However, a basement bathroom also delivers the highest boost to overall functionality and home value.

    2. Moisture Mitigation & Waterproofing

    Before framing walls or laying floors, the space must be completely dry and secure. Addressing existing moisture issues, installing vapor barriers, or sealing foundation walls adds upfront costs but protects your entire investment from future water damage.

    3. Electrical, Lighting, and HVAC

    Basements naturally lack abundant sunlight, requiring well-planned recessed lighting and strategic electrical outlets. Extending your existing HVAC system or adding a dedicated mini-split ensures comfortable temperature control year-round.

    4. Layout Complexity & Framing

    An open-concept media room requires fewer walls and interior doors than a floor plan segmented into multiple bedrooms, an office, and a gym. Custom structural modifications (such as removing support posts or altering load-bearing areas) require specialized engineering and increase overall costs.

    Avoiding Hidden Costs and Surprise Fees

    One of the biggest frustrations homeowners experience with home renovations is mid-project price spikes. When selecting basement remodeling services, ensure your contractor provides:

    • Detailed, Itemized Scope of Work: Clear specifications on materials, allowances, and labor tasks before construction starts.

    • Permit and Code Compliance Handling: Local permitting in Gwinnett County guarantees your electrical, plumbing, and framing meet safety standards—saving you expensive corrections when selling your home.

    • A Single Dedicated Point of Contact: Streamlined daily communication eliminates misunderstandings, delays, and unexpected charges.

    Ready to Map Out Your Basement Project?

    Investing in your basement expands your home’s footprint without the hassle or expense of moving. Partnering with an experienced, licensed local contractor guarantees your project stays on schedule, within budget, and built to last.

    Looking for transparent pricing and expert execution?

    Contact Hill Residential Contractors today to schedule your personalized consultation and request an accurate estimate for your home.

  • 7 Smart Basement Remodeling Ideas to Maximize Your Living Space

    An unfinished or outdated basement represents the single largest untapped asset in your home. When planned thoughtfully, transforming this subterranean space can practically double your usable square footage while significantly increasing your property value.

    However, creating a truly functional, comfortable space requires more than just hanging drywall and laying carpet. Successful basement remodeling ideas rely on smart spatial planning, proper trade coordination, and mechanical integration—especially when designing multi-zone layouts.

    Here are 7 trending basement design concepts that maximize living space, along with the essential plumbing and HVAC planning required to bring them to life.

    Trending Basement Layout Ideas

    1. The Immersive Home Theater & Media Room

    A dedicated media room leverages a basement’s natural environment: minimal natural light and concrete noise dampening.

    • Design Tip: Use tiered seating, dimmable LED cove lighting, and acoustic drywall or wall panels to eliminate echo and sound bleed to upper floors.

    2. A Private Guest Suite or In-Law Apartment

    A basement bedroom suite provides privacy for visiting family or long-term guests.

    • Design Tip: Local building codes strictly require an egress window or exit door in every basement bedroom for emergency escape. Factor in space for an en-suite bathroom and closet storage early in the design phase.

    3. Dedicated Home Gym & Wellness Studio

    Skip the commute to the gym by converting a basement zone into a custom fitness space.

    • Design Tip: Install shock-absorbing rubber flooring over concrete slabs to protect your joints and equipment. Include a dedicated wall for mirrors and proper ventilation to keep the area fresh.

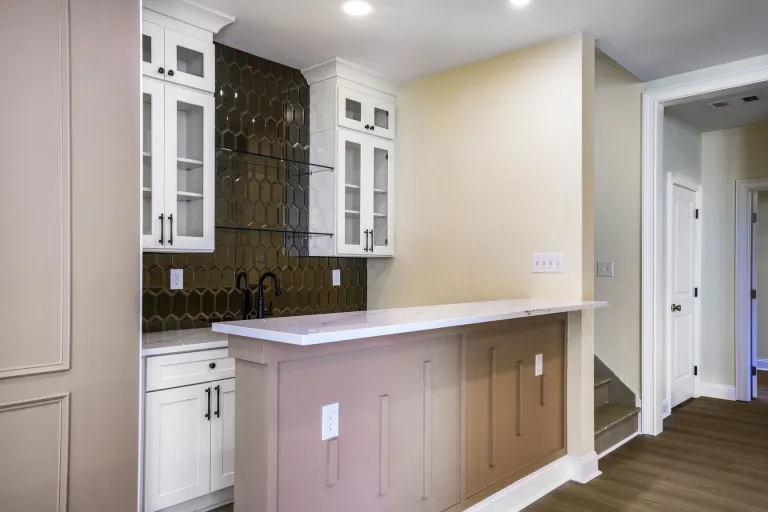
    4. Custom Wet Bar or Kitchenette

    A wet bar acts as the ultimate anchor for hosting game nights, dinner parties, or family gatherings.

    • Design Tip: Keep layouts flexible by installing a full-length counter, beverage fridge, sink, and floating shelving for glassware.

    5. Multi-Functional Playroom & Learning Zone

    Keep main-floor living areas clutter-free by dedicating a basement area to kids’ play and study.

    • Design Tip: Incorporate low-level built-in cabinetry, durable waterproof flooring (like LVP), and flexible lighting that transitions as children grow into teenagers.

    6. Executive Home Office

    For remote workers, a quiet basement office provides physical separation between work and home life.

    • Design Tip: Prioritize hardwired Ethernet connections, recessed task lighting, and soundproofing insulation in the joists above to block overhead foot traffic.

    7. The Ultimate Open-Concept Game Room

    Combine billiards, ping pong, or arcade consoles with a lounge area for maximum versatility.

    • Design Tip: Use structural posts as natural dividers between the gaming zone and media seating rather than building full walls that block light and restrict flow.

    Planning Plumbing & HVAC for Multi-Functional Basements

    Executing a complex finished basement layout requires careful mechanical planning before framing begins. When combining multiple room uses—such as a wet bar adjacent to a home theater—engaging professional basement remodeling services guarantees your infrastructure is built to code.

    Mechanical System Key Planning Consideration Best Practice Solution
    Plumbing Waste lines sit below municipal sewer main level Install a sub-slab ejector pump system or trench concrete for gravity drainage early.
    HVAC Airflow Basements naturally trap cold, damp air Add dedicated supply registers AND return air vents to prevent stale air stagnation.
    Humidity Control Concrete foundation walls exude ambient moisture Integrate a whole-home dehumidifier or dedicated sub-zone thermostat.
    Zoning Different rooms have unique heating/cooling demands Install a ductless mini-split system for targeted climate control in gyms or bedrooms.

    How to Coordinate Trades for a Multi-Zone Build

    1. Map Out Wet Areas Together: Group your basement bathroom, wet bar, and laundry room along shared wall corridors. This minimizes the amount of concrete trenching required for drain pipes.

    2. Balance HVAC Vents: Gyms and media rooms filled with electronics generate excess heat, while basement bedrooms stay cool. Proper supply-and-return sizing ensures consistent temperatures across all zones.

    3. Rough-In Before Framing: Always complete plumbing drain lines, electrical wiring, and ductwork modifications before insulation and drywall close off access.

    Build Your Dream Basement with Hill Residential Contractors

    Whether you want to add a luxury wet bar, build a private guest suite, or create a family entertainment hub, proper execution behind the walls determines how well your basement performs over time.

    At Hill Residential Contractors, our team specializes in comprehensive basement design, code compliance, and custom remodeling tailored to your lifestyle.

    Ready to start your project? Contact us today to schedule a consultation and receive an itemized estimate for your basement remodel.

  • Finishing a Basement on a Budget: Where to Save and Where to Invest

    Finishing a Basement on a Budget: Where to Save and Where to Invest

    Finishing a basement is one of the single best investments you can make in your home. It instantly expands your usable square footage, increases resale value, and creates dedicated spaces for family rooms, home offices, or guest suites.

    However, costs can quickly escalate without a clear strategic plan. The secret to finishing a basement on a budget isn’t cutting corners—it’s knowing where to save on cosmetic finishes and where to invest in professional structural work.

    Where to Invest: Non-Negotiables for Long-Term Value

    Skimping on structural groundwork, moisture management, or code compliance often leads to costly repairs later. Allocate the core of your budget to these critical areas:

    1. Professional Waterproofing & Moisture Control

    Basements sit below grade, making moisture control your top priority. Before framing or hanging drywall, verify that your foundation is sealed and dry.

    • What to do: Install proper sub-slab vapor barriers, address exterior drainage issues, and seal any foundation cracks.

    • Why it matters: Skipping moisture protection will ruin expensive flooring, destroy drywall, and lead to mold growth down the road.

    2. Electrical, Plumbing, & HVAC Rough-Ins

    While cosmetic work can be updated over time, mechanical systems hidden behind drywall must be installed correctly the first time.

    • Electrical: Ensure your panel can support the additional load and that outlets meet local safety codes.

    • Plumbing: If you plan to add a bathroom or wet bar, install sub-slab rough-in plumbing early, even if you finish the room in a later phase.

    • HVAC: Basements require proper airflow and return vents to keep humidity levels down and balance room temperatures year-round.

    3. Permits and Code Compliance

    Unpermitted basement work can jeopardize your home sale, trigger steep municipal fines, or lead to denied insurance claims.

    • Key requirements: Code compliance ensures proper ceiling heights, fire-block framing, dedicated circuit placement, and code-mandated egress windows for basement bedrooms.

    Where to Save: Smart Cost-Cutting Strategies

    Once structural and mechanical systems are secure, use these budget-friendly design tactics to stretch your renovation dollars.

    Category High-Budget Choice Smart Budget Alternative
    Flooring Hardwood or Ceramic Tile Luxury Vinyl Plank (LVP) or Sheet Vinyl
    Ceilings Complex Drywall & Soffits Painted Industrial Ceiling or Drop Grid
    Layout Multi-Room Partitioning Open-Concept Zoning
    Storage Custom Built-in Millwork Modular Cabinetry & Floating Shelves

    1. Choose Open-Concept Layouts

    Every interior wall you add requires additional framing studs, drywall sheets, electrical outlets, doors, and trim.

    • The Budget Fix: Keep your layout mostly open. Use area rugs, furniture groupings, and subtle accent lighting to define separate zones (like a media nook and a workout space) without building unnecessary walls.

    2. Opt for Luxury Vinyl Plank (LVP) Flooring

    Hardwood floors are prone to warping under subterranean moisture, while cheap carpet traps dust and humidity.

    • The Budget Fix: Luxury Vinyl Plank (LVP) offers the appearance of real wood, is 100% waterproof, installs quickly, and can be placed directly over subfloor prep systems at a fraction of the cost.

    3. Consider an Industrial Painted Ceiling

    Drywalling around HVAC ducts and plumbing pipes requires custom soffits that drive up labor costs and reduce ceiling height.

    • The Budget Fix: Spraying the open joists and utilities with a uniform matte black or crisp white paint creates a modern, loft-style aesthetic. It preserves ceiling height, slashes labor costs, and keeps pipes accessible for future repairs.

    The Hybrid Approach: Phase Your Project

    If your ideal basement design exceeds your current budget, consider a phased build:

    1. Phase 1 (The Shell): Complete framing, waterproofing, electrical, plumbing rough-ins, drywall, and main lighting with a professional contractor.

    2. Phase 2 (The Finishes): Add interior doors, trim, paint, accent lighting, and decorative furniture over time as your budget allows.

    Plan Your Basement Remodel with Confidence

    A successful basement finish balances cost-effective cosmetic choices with expert construction behind the walls. Working with experienced professionals ensures your space is dry, safe, and built to code from day one.

    Ready to explore your options? Contact Hill Residential Contractors today for an on-site consultation and clear, itemized project estimate.

  • DIY vs. Professional Kitchen Remodel: What Homeowners Should Know Before Starting

    DIY vs. Professional Kitchen Remodel: What Homeowners Should Know Before Starting

    Between home renovation shows and endless YouTube tutorials, it’s easy to feel like a kitchen remodel is more approachable than it actually is. Some parts genuinely are — plenty of homeowners save real money doing certain tasks themselves. Other parts carry risks (safety, code compliance, and simply redoing expensive work) that make hiring a licensed professional the far cheaper option in the long run, even though it doesn’t feel that way upfront.

    Here’s an honest breakdown of what’s reasonable to DIY, what shouldn’t be, and where the real hidden costs show up.

    Tasks That Are Reasonable to DIY

    • Painting cabinets or walls — time-consuming but low-risk, and a huge visual impact for the cost of paint and supplies
    • Swapping cabinet hardware — pulls, knobs, and hinges are a straightforward weekend project
    • Installing open shelving — as long as you’re anchoring into studs correctly, this is a manageable project for most homeowners
    • Painting or refinishing an old backsplash with a specialty paint kit, as a temporary or budget-friendly refresh
    • Removing old caulk and re-caulking around sinks and countertops
    • Basic demo prep — clearing cabinets, removing drawer fronts, or pulling out old appliances before a contractor’s crew arrives, which can sometimes reduce labor costs if your contractor allows it

    Tasks That Should Go to a Licensed Professional

    • Electrical work. New circuits, moved outlets, or under-cabinet lighting wiring should go through a licensed electrician — beyond the safety risk, unpermitted electrical work is a common issue that surfaces during home inspections when you go to sell.
    • Plumbing and gas line work. Moving a sink, adding a second prep sink, or relocating a gas range all require licensed trades and, in most areas including Gwinnett County, a permit.
    • Structural changes. Removing or altering a wall — especially a load-bearing one — requires an understanding of your home’s framing that goes well beyond a weekend project, plus engineering and inspection sign-off.
    • Cabinet installation for a full remodel. Cabinets need to be level, secured properly into studs, and aligned precisely for doors and drawers to function correctly — small errors compound quickly across a full kitchen.
    • Countertop templating and installation. Stone and quartz countertops are heavy, precisely cut, and unforgiving of measurement errors. This is squarely a professional job.
    • Anything requiring a permit. If your project needs a permit, it typically also needs a licensed contractor pulling it and standing behind the work.

    The Hidden Costs of DIY Mistakes

    The upfront savings of DIY can disappear fast once something goes wrong:

    • Permit violations. Unpermitted electrical, plumbing, or structural work can create real problems at resale — buyers’ inspectors catch this, and it can hold up or kill a sale.
    • Redo costs. Misaligned cabinets, uneven tile, or a countertop that doesn’t fit correctly often costs more to fix than it would have cost to do right the first time.
    • Insurance complications. Damage caused by unpermitted or non-code-compliant work is sometimes excluded from homeowners insurance claims.
    • Safety risk. Electrical and gas work done incorrectly isn’t just a code issue — it’s a genuine fire and safety hazard.

    The Time and Tool Investment People Underestimate

    Even for tasks that are technically DIY-able, most homeowners underestimate two things: how long it actually takes when you’re learning as you go, and how many specialty tools a proper job requires. A cabinet install that takes an experienced crew a few days can stretch into weeks of evenings and weekends for a first-timer — and that’s before accounting for tools (levels, jigs, a good miter saw) that aren’t worth buying for a single project.

    A Middle Ground: Partial DIY With Professional Oversight

    You don’t have to choose all-DIY or all-professional. Many homeowners save real money by handling the cosmetic, low-risk pieces themselves — painting, hardware, minor demo — while hiring a licensed contractor for electrical, plumbing, structural work, cabinet installation, and countertops. A good contractor will tell you honestly where that line makes sense for your specific project, rather than insisting on an all-or-nothing approach.

    Frequently Asked Questions

    Can I do my own kitchen demo to save money? Sometimes, yes — clearing cabinets and removing non-structural finishes is often fine to DIY. Just confirm with your contractor first, since some demo work (especially anything near plumbing, electrical, or gas lines) is safer left to the crew that will also be doing the rebuild.

    Is it cheaper overall to DIY a full kitchen remodel? It can look cheaper on paper, but factoring in tool costs, the time investment, the risk of costly mistakes, and the value of proper permits and licensed work, most homeowners find a hybrid approach — DIY on cosmetic tasks, professional for everything structural, electrical, and plumbing — delivers the best real-world value.

    How do I know if a wall in my kitchen is load-bearing? You generally can’t tell just by looking at it. A contractor or structural engineer needs to assess your home’s framing before any wall comes down — this is one of the clearest lines where DIY guesswork can turn into an expensive and dangerous mistake.

    Trying to figure out what you can DIY and what needs a pro? Hill Residential Contractors gives homeowners across Gwinnett County and the Atlanta metro an honest assessment of where DIY makes sense and where it doesn’t — before any work begins. Schedule a free consultation or call (770) 568-0060.

  • U-Shaped vs. L-Shaped Kitchen Layouts: Which Works for Your Home?

    U-Shaped vs. L-Shaped Kitchen Layouts: Which Works for Your Home?

    Before cabinet colors, countertop materials, or lighting ever come up, every kitchen remodel starts with one foundational decision: the layout. Two of the most common configurations we work with — especially in the mix of ranch-style, traditional, and newer-construction homes across Gwinnett County — are U-shaped and L-shaped kitchens. They look similar on paper but function very differently, and picking the right one affects everything else in your remodel.

    What Is a U-Shaped Kitchen?

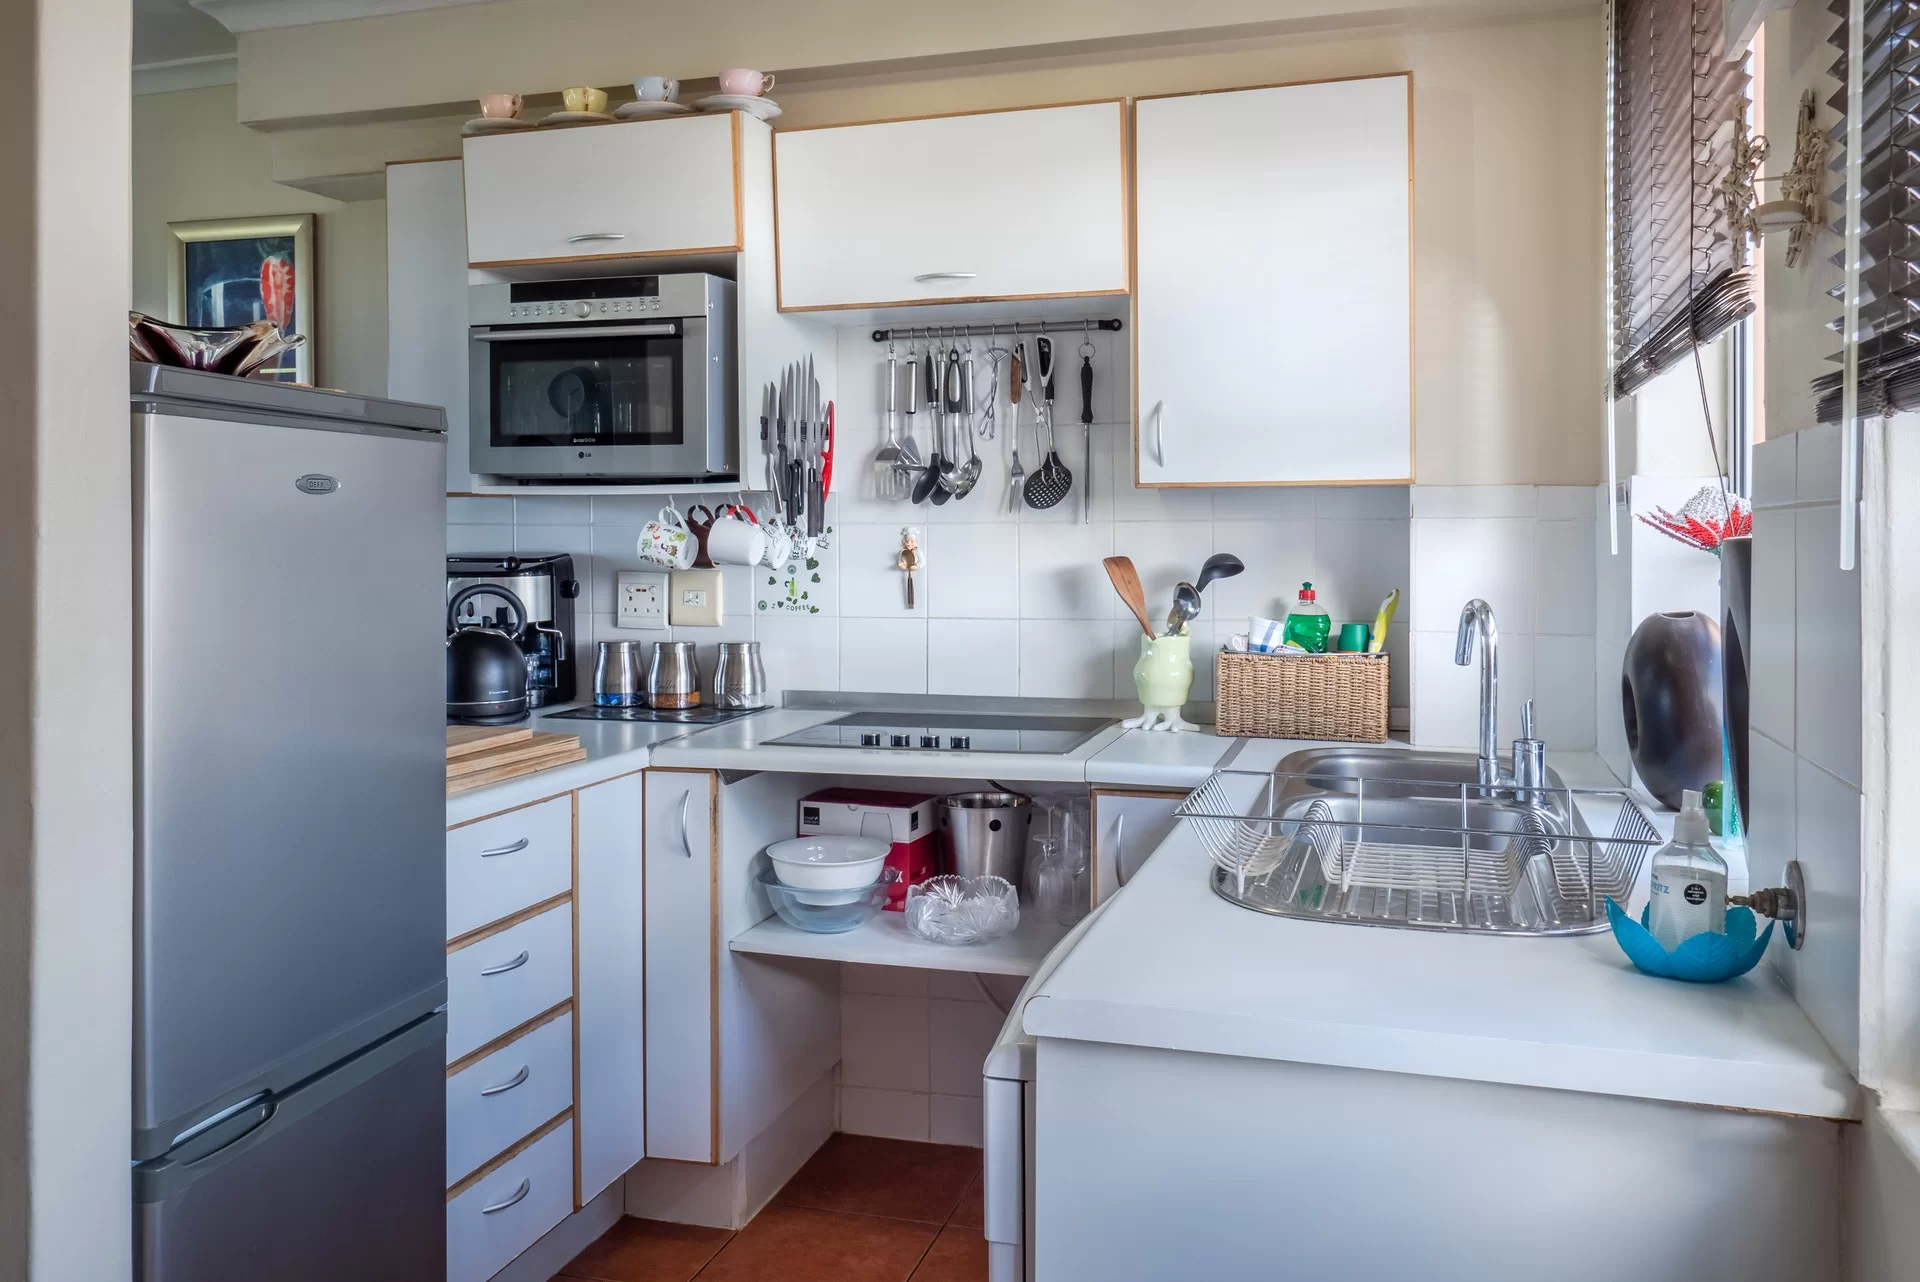
    A U-shaped kitchen uses three connected walls of cabinetry and countertop, wrapping around the room in a horseshoe. It’s one of the most efficient layouts for a dedicated cook, since everything — the sink, stove, refrigerator, and prep space — sits within a tight, enclosed work zone.

    Advantages:

    • Maximum counter and storage space for the square footage
    • Highly efficient work triangle, since nothing is far from anything else
    • Naturally contains a single cook’s workflow without much crossover traffic

    Trade-offs:

    • Needs a reasonably sized, roughly square room to avoid feeling cramped — generally at least 8 by 8 feet at minimum, more comfortably 10 by 10 or larger
    • Can feel closed off unless one end opens to an adjoining room or an island is scaled down or removed
    • Less naturally suited to open-concept living, since three walls of cabinetry inherently define a separate room

    What Is an L-Shaped Kitchen?

    An L-shaped kitchen uses two connecting walls at a right angle, leaving the rest of the room open. It’s one of the most flexible and popular layouts in modern remodels because it naturally supports open-concept living.

    Advantages:

    • Leaves open floor space for an island, a dining table, or a direct sightline into a living or dining area
    • Works well in both large and small rooms — scales up or down more easily than a U-shape
    • Naturally suited to multi-cook households or families who want the kitchen to feel connected to the rest of the home

    Trade-offs:

    • Can have a less efficient work triangle if the two walls are very long, meaning more walking between the sink, stove, and refrigerator
    • Corner cabinet space (where the two walls meet) needs a smart storage solution — a lazy Susan or diagonal pull-out — or it becomes dead space
    • Without an island or peninsula, an L-shaped kitchen can end up with less total counter and storage space than a U-shaped kitchen of the same square footage

    Side-by-Side Comparison

    U-ShapedL-Shaped
    Best forDedicated cooks, enclosed kitchensOpen-concept living, multi-use spaces
    Counter & storage spaceGenerally more, for the same footprintGenerally less, unless paired with an island
    Work triangle efficiencyVery highGood, depends on wall length
    Open-concept friendlyLess naturally, unless modifiedVery naturally
    Minimum room sizeLarger — needs a roughly square footprintMore flexible — works in smaller or narrow rooms
    Popularity in 2026 remodelsCommon in dedicated, enclosed kitchensThe more common choice in open floor plans

    Which Layout Is Right for Your Home?

    A few questions help clarify which direction makes sense for your space:

    • Do you want your kitchen open to the living or dining room, or kept as its own defined space? L-shaped layouts naturally support an open floor plan; U-shaped layouts naturally define a separate room.
    • How much counter and storage space do you actually need? If you do a lot of cooking, baking, or entertaining and want maximum workspace, a U-shape typically wins for the same square footage.
    • What’s the actual shape of your room? A long, narrow room often suits an L-shape better; a more square room can support either layout comfortably.
    • Is a wall removal on the table? Converting a closed-off U-shaped kitchen into an open L-shaped layout by removing a wall is one of the most common layout changes we’re asked about — and one where a contractor needs to confirm whether that wall is load-bearing before anything else gets decided.

    Neither layout is objectively better — it comes down to how your household actually uses the kitchen, the shape of the room you’re starting with, and whether an open or enclosed feel matters more to you.

    Frequently Asked Questions

    Can I convert a U-shaped kitchen into an L-shaped kitchen? Yes — usually by removing one wall of cabinetry, sometimes paired with taking down a wall to an adjoining room. This is a popular update in older homes with closed-off, U-shaped kitchens that homeowners want to open up.

    Which layout is better for resale value? Open, L-shaped layouts tend to be more universally appealing in today’s market since open-concept living remains a strong buyer preference, though a well-designed U-shaped kitchen with good flow and storage is far from a dealbreaker.

    Do I need an island with either layout? Not necessarily. U-shaped kitchens often skip an island entirely if the room isn’t large enough, relying on the three walls for all their counter space. L-shaped kitchens frequently add an island or peninsula specifically to make up for the storage and prep space the third wall would have provided.

    Not sure which layout fits your space? Hill Residential Contractors will walk your kitchen with you and give you an honest read on what your room can actually support — U-shape, L-shape, or something else entirely. Schedule a free consultation or call (770) 568-0060.

  • Best Kitchen Lighting Ideas for Every Layout

    Best Kitchen Lighting Ideas for Every Layout

    Lighting gets planned last in a lot of kitchen remodels — and it shows. A kitchen with beautiful cabinets and countertops under a single flat overhead light still feels flat and unfinished, while a modestly finished kitchen with thoughtful lighting can feel genuinely custom. Lighting design has become such a priority in 2026 that it’s shifted from an afterthought to one of the first things designers plan for.

    Here’s how to think through kitchen lighting the right way, based on your layout.

    The Three Layers Every Kitchen Needs

    Good kitchen lighting isn’t one fixture — it’s three layers working together, each on its own switch or dimmer:

    1. Ambient lighting — general overhead light that fills the room (recessed cans, a flush-mount, or a chandelier)
    2. Task lighting — focused light exactly where you’re working (under-cabinet LEDs over countertops, a fixture over the sink)
    3. Accent lighting — the layer that adds mood and personality (pendant lights, toe-kick lighting, LED strips inside glass cabinets or open shelving)

    Skipping any one of these layers is usually what makes a kitchen feel either too dim to cook in or too clinical to enjoy sitting in.

    Lighting by Kitchen Layout

    Small kitchens Shadows are the enemy in a small kitchen. Under-cabinet lighting is non-negotiable here since a single overhead fixture rarely reaches every countertop evenly. Keep ambient lighting bright and even, and use one accent fixture — a single pendant or a sconce — rather than multiple statement pieces that can visually crowd a small room.

    Galley kitchens With two parallel walls, a single centered ceiling fixture almost never lights both counter runs evenly. Under-cabinet lighting on both sides matters more here than in almost any other layout, paired with recessed ambient lighting down the length of the walkway.

    Island kitchens This is where accent lighting gets to shine — literally. 2026 trends favor sculptural, artistic pendant clusters over the island rather than three matching identical fixtures in a row. Hang pendants 30–36 inches above the counter, and make sure the fixture scale matches the island’s size — too small and it disappears, too large and it dominates the room.

    Open-concept kitchens When the kitchen flows into a living or dining space, lighting needs to work as a transition, not a hard stop. Layered lighting with dimmable zones lets the kitchen shift from bright and task-focused during cooking to warm and ambient during a dinner party, without a jarring difference between the kitchen and adjoining room.

    2026 Kitchen Lighting Trends Worth Considering

    • Statement and sculptural pendants. Organic, artistic shapes — think blown glass clusters or curved silhouettes — are replacing matched, uniform fixture rows as the go-to island lighting choice.
    • Integrated LED lighting in shelving and niches. Rather than relying only on ceiling and under-cabinet fixtures, designers are building soft LED lighting directly into open shelving and cabinet niches for a layered, ambient glow.
    • Decorative wall sconces. Wall lighting is moving beyond hallways and living rooms into kitchens, especially over open shelving, adding warmth and a more “designed” feel.
    • Smart, tunable lighting. Systems that automatically adjust brightness and color temperature throughout the day — brighter and cooler for morning prep, warmer and dimmer for evening meals — are increasingly standard in mid-to-upper-range remodels.
    • Warmer, dimmable everything. As cabinet colors trend darker and richer (navy, forest green, warm wood tones), lighting is shifting warmer and more layered to match, rather than the stark, bright-white lighting that suited all-white kitchens.

    Common Kitchen Lighting Mistakes

    • Relying on a single ceiling fixture for the whole room, leaving countertops in shadow
    • Skipping under-cabinet lighting to save on budget — it’s one of the highest-impact, most affordable upgrades available
    • Putting everything on one switch, so you can’t dim for ambiance without cooking in the dark, or brighten for cleanup without ruining the mood
    • Hanging island pendants too high or too low — both throw off the visual balance of the room and can obstruct sightlines across an open kitchen

    Frequently Asked Questions

    How many recessed lights does a typical kitchen need? It depends on room size and ceiling height, but a common approach is spacing recessed lights roughly 4–6 feet apart across the ambient layer, then adding task and accent lighting on top of that base.

    Is under-cabinet lighting worth the cost? Yes — it’s consistently one of the best-value upgrades in a kitchen remodel, eliminating shadows on your primary work surface for a relatively small addition to the overall project cost.

    Can I add better lighting without a full remodel? Often, yes. Under-cabinet LEDs, a new pendant fixture, and switching to dimmers can meaningfully improve a kitchen’s lighting without touching cabinets, countertops, or layout — though anything requiring new wiring should go through a licensed electrician.

    Ready to fix your kitchen’s lighting for good? Hill Residential Contractors designs layered lighting plans as part of every kitchen remodel for homeowners across Gwinnett County and the Atlanta metro. Schedule a free consultation or call (770) 568-0060.

  • Kitchen Backsplash Ideas That Complement Any Cabinet Color

    Kitchen Backsplash Ideas That Complement Any Cabinet Color

    The backsplash is one of the smallest surfaces in a kitchen remodel by square footage — and one of the biggest by visual impact. It’s also one of the more affordable ways to modernize a kitchen without touching cabinets, layout, or appliances. The trick is choosing a backsplash that actually complements your cabinet color instead of fighting with it.

    Here’s how to think through backsplash choices by cabinet color, plus the styles and materials showing up most in 2026 remodels.

    Backsplash Ideas by Cabinet Color

    White or light cabinets White cabinets pair well with almost anything, which is exactly why they’re a popular starting point. For a timeless look, a classic (but updated) subway tile in a beveled or handmade finish adds texture without competing with the cabinetry. For more visual interest, a bold mosaic or a slab backsplash with dramatic veining gives white cabinets a focal point they otherwise lack.

    Navy, forest green, or black cabinets Dark, saturated cabinet colors are one of the biggest cabinet trends heading into 2026, and they call for a backsplash that either contrasts sharply or blends seamlessly — the middle ground tends to look muddy. A light, reflective slab or a soft white zellige tile creates crisp contrast. Alternatively, a slab backsplash in the same material as the countertop creates a quiet, monochromatic look that lets the cabinet color do all the talking.

    Wood-tone cabinets Warm wood cabinetry is making a real comeback as an alternative to all-white kitchens. Zellige tile — with its handmade, slightly irregular surface — pairs especially well here, adding warmth and texture that complements rather than competes with wood grain. Natural stone with earthy veining is another strong match.

    Two-tone cabinets When your cabinets are already doing two colors, the backsplash usually works best as a unifying, quieter element — a simple subway pattern or a slab in a neutral tone that ties the upper and lower cabinet colors together rather than adding a third competing color.

    2026 Backsplash Trends Worth Knowing

    • Slab backsplashes. Running the same countertop material up the wall creates one continuous, seamless surface — a look that’s grown significantly in popularity, especially in kitchens with dramatic stone veining.
    • Zellige tile. Handmade, slightly imperfect, and full of texture — zellige is one of the most requested materials for homeowners wanting a warmer, more artisanal look than standard tile.
    • Geometric and patterned tile. Instead of a flat field of matching tile, patterned layouts (picket, herringbone, hexagon) are being used to add movement and visual structure, especially behind the range.
    • Updated subway tile. Subway tile isn’t going anywhere, but 2026 versions look different — vertical layouts instead of horizontal, beveled edges that catch light, and warm off-white or cream tones instead of stark white.
    • Dark neutral backsplashes. A shift away from the all-white-and-gray palette toward deeper tones — olive, charcoal, deep plum, warm brown — especially at the higher end of the design spectrum.
    • Mosaic backsplashes. For homeowners who want a genuine art-like focal point, mosaic tile mixing colors, textures, and finishes remains one of the most expressive, custom-feeling options.

    Practical Considerations Beyond Style

    • Maintenance. Fewer grout lines (large-format tile or slab) generally means less cleaning and less risk of staining over time. Textured or handmade tile looks great but can require more upkeep in grease-prone zones near the range.
    • Cost tiers. Ceramic subway tile remains one of the most budget-friendly options; natural stone, slab, and handmade zellige sit at the higher end of the cost range.
    • Longevity vs. trend. A neutral subway or slab backsplash tends to age better if you plan to stay in your home long-term or want to keep resale value broad; bolder colors and patterns make a stronger design statement but are a more personal choice.

    Frequently Asked Questions

    Should my backsplash match my countertop exactly? It doesn’t have to, but a slab backsplash in the same material as your countertop is one of the most popular current looks because it removes visual “seams” in the kitchen. A contrasting backsplash also works well if you want the wall to be its own design moment.

    What’s the most low-maintenance backsplash option? Large-format tile or a slab backsplash, since fewer grout lines mean less to clean and less chance of staining, especially near the stove.

    Is peel-and-stick backsplash a good option? It can work as a budget-friendly, temporary upgrade, but it doesn’t hold up as long or look as premium as real tile, stone, or slab, and isn’t something we’d recommend as part of a full kitchen remodeling meant to last.

    Not sure which backsplash fits your cabinets? Hill Residential Contractors can bring samples to your home and help you choose a backsplash that actually works with your cabinet color, countertops, and lighting — not just what looks good on a screen. Schedule a free consultation or call (770) 568-0060.

  • How Long Does a Kitchen Remodel Really Take? A Step-by-Step Timeline

    How Long Does a Kitchen Remodel Really Take? A Step-by-Step Timeline

    “How long is this actually going to take?” is one of the first questions almost every homeowner asks us — and it’s a fair one. Living without a functional kitchen for weeks (or months) is a real disruption, and vague answers like “it depends” aren’t very helpful when you’re trying to plan around it.

    Here’s a realistic, phase-by-phase breakdown of what a kitchen remodel timeline actually looks like, so you can plan accordingly.

    The Short Answer

    For most homeowners in the Atlanta metro, a mid-range kitchen remodel takes about 6 to 10 weeks from demolition to final walkthrough. A cosmetic refresh (paint, hardware, countertops, no layout changes) can be done in 2 to 4 weeks. A full gut renovation with layout changes and custom cabinetry can run 3 to 4 months or longer.

    That said, the timeline really breaks down into two phases most people forget to account for: planning (which happens before any demolition starts) and construction (the part everyone pictures when they think “remodel”).

    Phase 1: Planning & Design (2–6 Weeks, Before Work Begins)

    This phase happens before a single wall comes down, and rushing it is one of the biggest causes of delays later:

    • Initial consultation and walkthrough
    • Design decisions — layout, cabinet style, countertop material, appliance selections
    • Written estimate and contract
    • Material ordering — this is often the biggest hidden timeline factor. Custom or semi-custom cabinets alone can take 4–8 weeks to arrive after they’re ordered.
    • Permit application and approval, if your project requires one

    Tip: Ordering cabinets and long-lead-time items as early as possible — even before demolition starts — is one of the most effective ways to keep your project on schedule.

    Phase 2: Demolition (2–5 Days)

    Once materials are ordered (or at least on their way) and permits are in hand, demolition typically moves fast:

    • Removal of existing cabinets, countertops, backsplash, and flooring
    • Disconnecting appliances, plumbing, and electrical as needed
    • Disposal and site prep for the next phase

    Phase 3: Rough-In Work (3–7 Days)

    If your remodel involves layout changes, this is where electrical, plumbing, and sometimes HVAC get relocated or upgraded:

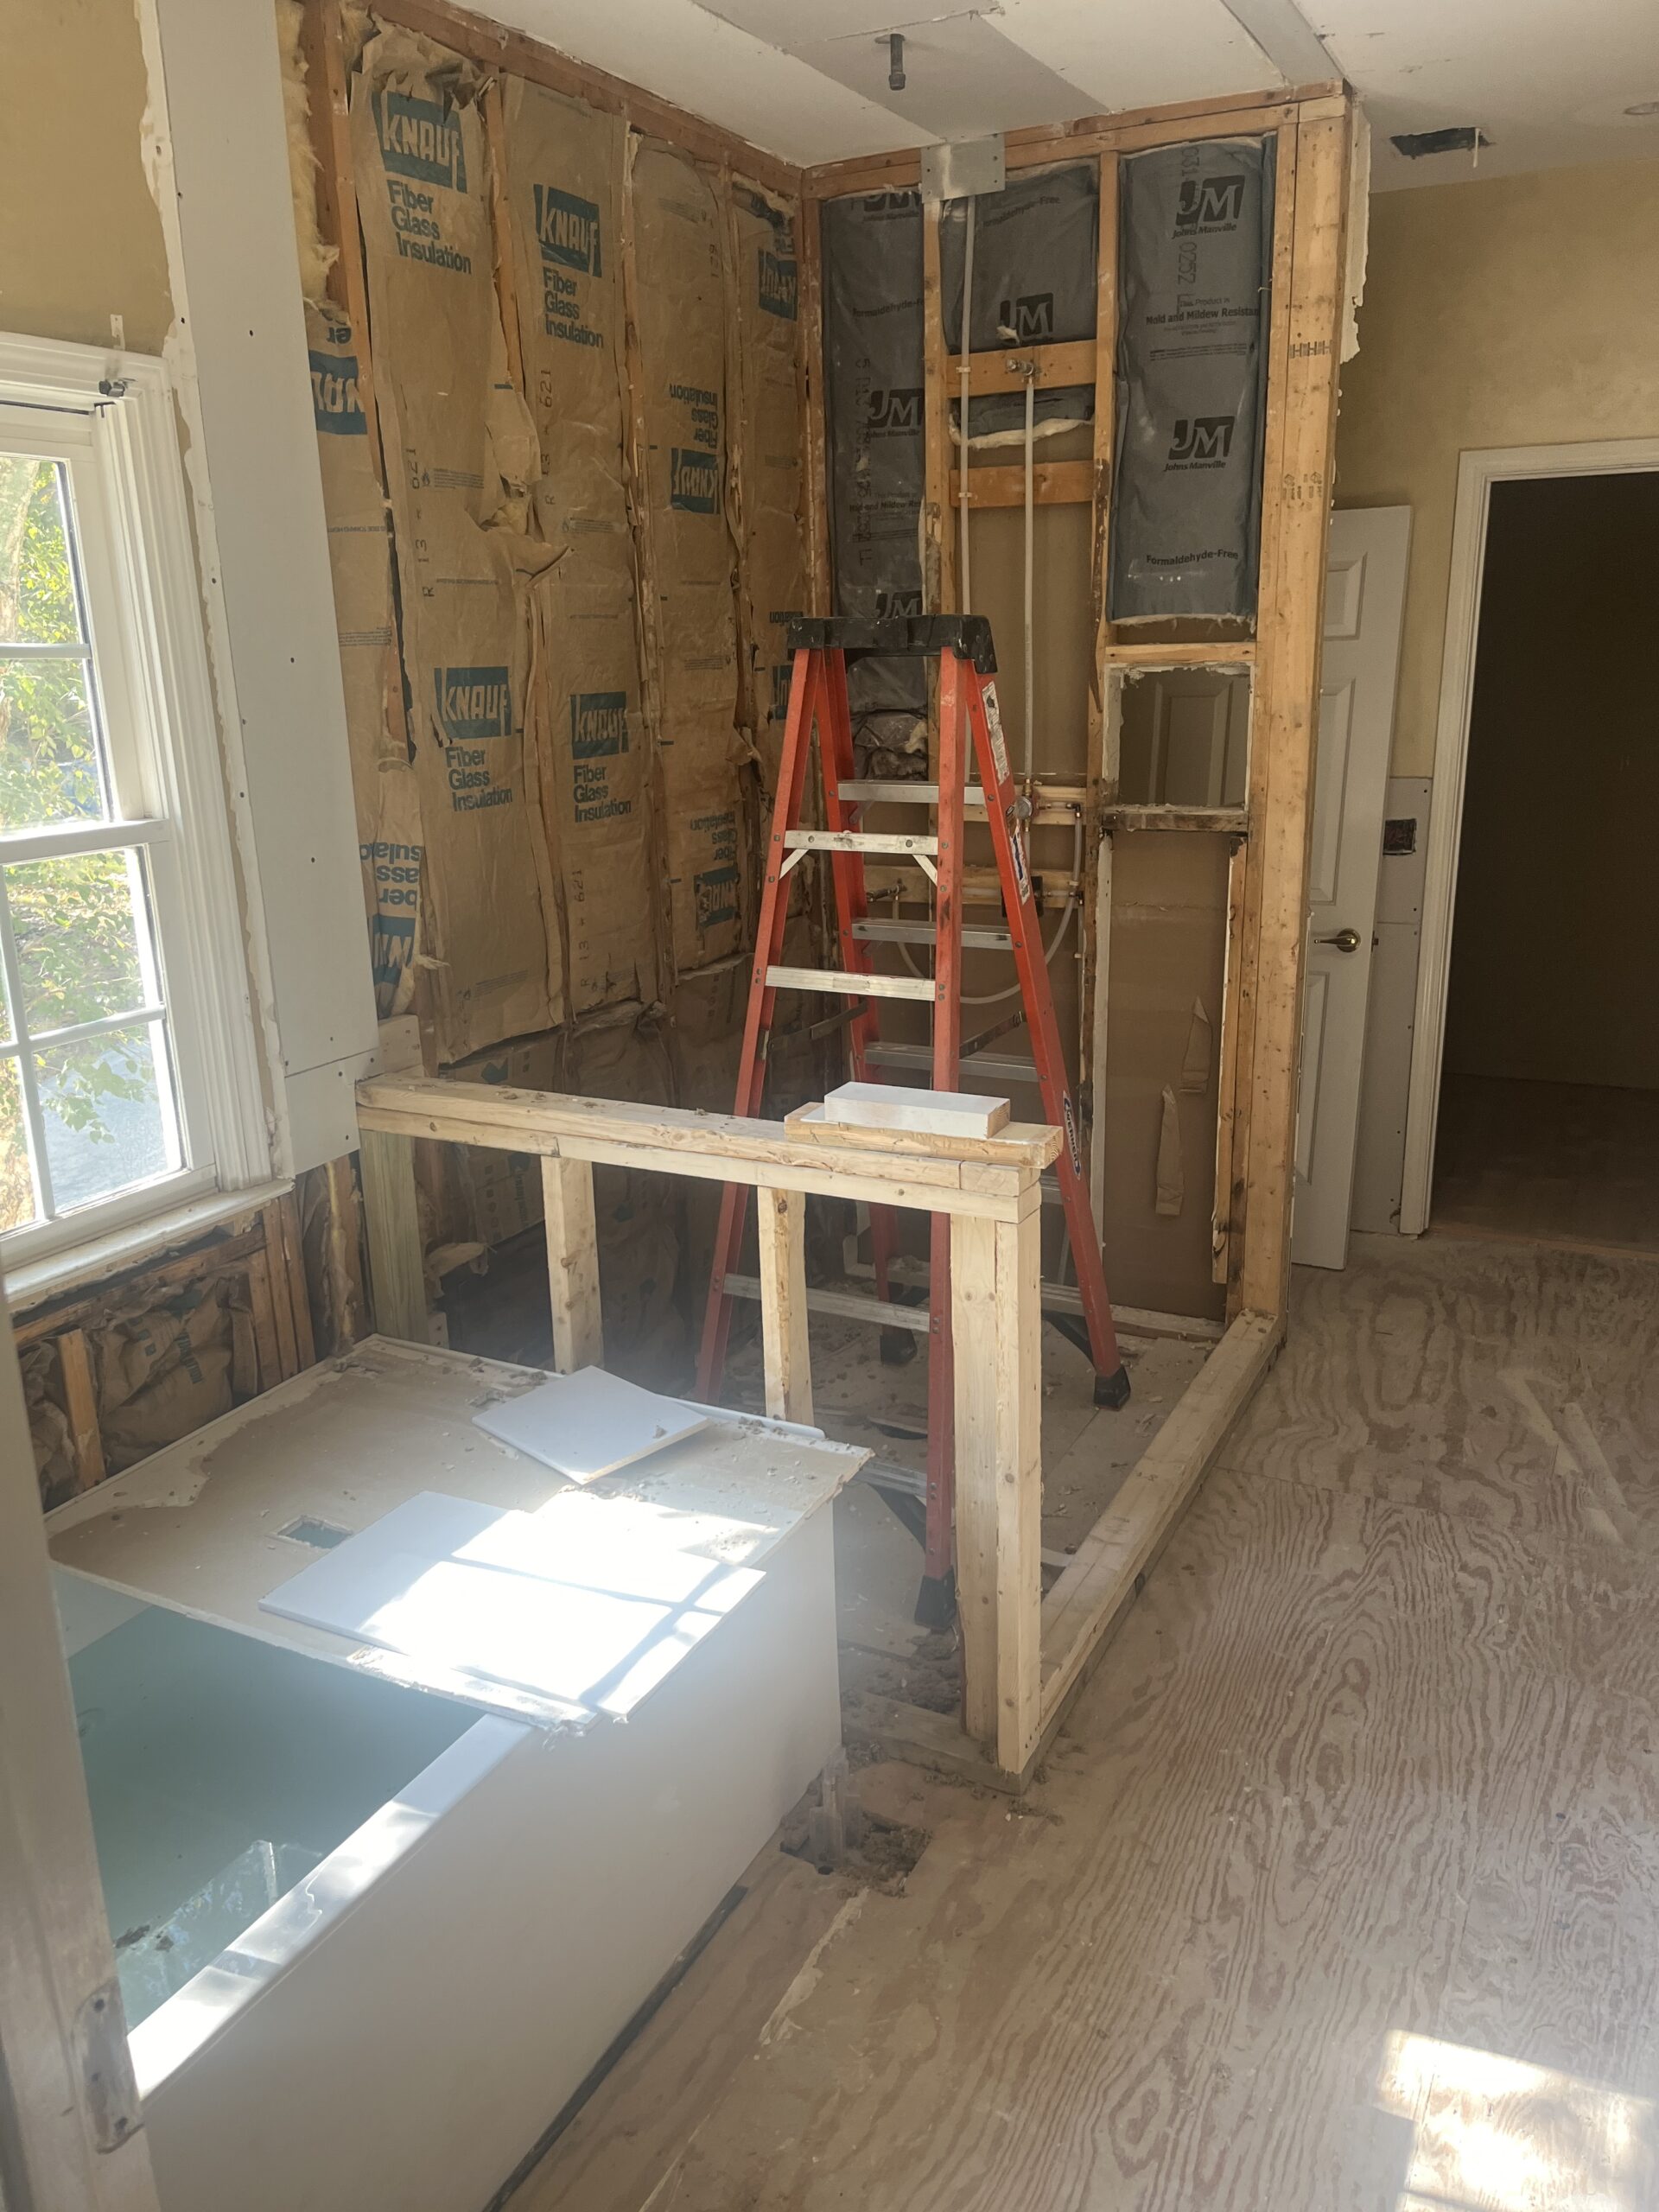
    • Running new electrical for lighting, outlets, or appliance circuits
    • Moving or adding plumbing lines for sinks, dishwashers, or a new island
    • Framing changes if a wall is coming down or a layout is shifting
    • Inspection sign-off before walls are closed up

    Kitchens that keep their existing layout often skip most of this phase entirely, which is one of the biggest reasons a “same footprint” remodel moves faster than one with layout changes.

    Phase 4: Drywall, Paint & Flooring (1–2 Weeks)

    • Drywall repair or replacement
    • Priming and painting
    • Flooring installation (tile, LVP, or hardwood)

    Flooring is often installed before cabinets so there’s a clean, level surface for cabinet installation — though this can vary by contractor and material.

    Phase 5: Cabinet Installation (3–5 Days)

    • Base and upper cabinet installation
    • Leveling and securing to walls
    • Installing cabinet hardware

    This is usually the point in the project where it starts to look like a kitchen again — a genuine morale boost after weeks of exposed subfloor and studs.

    Phase 6: Countertop Templating & Installation (1–2 Weeks)

    • Countertops are precisely measured (templated) after cabinets are installed and leveled
    • Fabrication typically takes 5–10 business days depending on material
    • Installation is usually completed in a single day

    This step is one of the few in the process that can’t be rushed — countertops have to be templated after cabinets go in, not before, so this phase has a built-in waiting period.

    Phase 7: Backsplash, Plumbing & Electrical Fixtures (3–5 Days)

    • Backsplash tile installation
    • Faucet, sink, and disposal hookup
    • Light fixture and outlet/switch installation
    • Appliance installation and connection

    Phase 8: Final Punch List & Walkthrough (1–3 Days)

    • Final inspections, if required
    • Touch-up paint, caulking, and adjustments
    • Walkthrough with your contractor to address any remaining items

    What Can Extend a Kitchen Remodel Timeline?

    • Custom cabinetry — longer lead times than stock or semi-custom options
    • Structural changes — removing walls, especially load-bearing ones, adds engineering and inspection steps
    • Older homes — outdated wiring, plumbing, or water damage discovered mid-project can add unplanned work
    • Material backorders — especially for specialty tile, stone, or appliances
    • Permit delays — timelines vary by county and municipality
    • Change orders — decisions made mid-project (a different countertop, an added outlet) almost always add time

    How to Keep Your Project on Schedule

    • Finalize all design decisions before demolition starts, not during
    • Order cabinets, countertops, and appliances as early as your contractor recommends
    • Have a contingency budget and timeline buffer (10–15%) for older homes especially
    • Choose in-stock or quick-ship materials if your timeline is tight
    • Get a clear, written schedule from your contractor and ask what could change it

    Frequently Asked Questions

    Can I still use my kitchen during a remodel? Not typically once demolition starts. Most homeowners set up a temporary kitchen station — a folding table, microwave, and mini-fridge in another room — for the duration of the project.

    What’s the single biggest factor in how long a kitchen remodel takes? Whether the layout is changing. A remodel that keeps the existing footprint (same location for sink, stove, and cabinets) skips most of the rough-in and inspection steps that add weeks to a project.

    Is it faster to remodel in a particular season? Not dramatically, though scheduling with a contractor can be tighter in spring and early summer when demand is highest across the Atlanta metro. Booking a few months ahead generally gives you more flexibility on start dates.

    Want a realistic timeline for your specific kitchen? Hill Residential Contractors will walk your space, talk through your priorities, and give you an honest, written timeline before any work begins. Schedule a free consultation or call (770) 568-0060.